Greg Lund undoubtedly has the most advanced turbo TR6 on the planet. His car is equipped with a Garrett T04 turbo, intercooler, and Electromotive controlled fuel & spark management. He runs up to 25 pounds of boost.
The following is Greg's explanation of the genesis of his system:
I first turboed my 6 in 1981. It was a carbureted, draw through system then which worked pretty well. It even passed Az
emissions. In 1984 I purchased two Lucas PI systems from Terry O'Beirne. They were an improvement over carburetion, however,
it is a major pain to dial in the fuel curve. I had the unit off and on more than 50 times to get it close. I finally ended up
cutting the Lucas throttle bodies for Bosch style electronic injectors and installed an Electromotive Tec II direct ignition
& fuel management system. This allowed me to get rid of the distributor too. Now it just takes a laptop to do the
fuel/ignition curves.
I ran a Rajay 301F60 & Rajay waste gate. Bottom end was stock and ran 12 psi with race gas & 9 psi with street gas. I broke three stock pistons in the process of discovering that someone had milled the head to achieve 10 to 1 compression. Actually the ring lands broke which is the failure mode when a cast piston can't handle the force of the combustion pressure. That was when I went to the Arias pistons - to get more strength and for the dish to lower compression down to 9 to 1.
The engine currently has Cosworth pistons, lightened rods, roller rockers, .500" cam lift, stainless valves etc. I have recently installed a more modern turbo (Garrett T03/4 hybrid) to get faster spool up. The rest of the car has been highly modified also with brake & suspension changes. The best part is that it looks completely stock to most people except for the 16" Panasports and large single exhaust pipe.
As for the Cosworth pistons we run them in the race car and these were good used ones that just needed to have the top ring lands cut for the next bigger size ring- 1.2mm. I am lucky that a close friend of mine works for Total Seal so I get all the latest info and help from him. Also the Cosworth piston is very durable, light, and it is the only readily available high performance piston available for the 6 which is cam ground (better tolerance in the side clearance at varying temperatures)
I am running a Spearco that I had custom fabricated. It fits behind the grill from about the center of the grill to the passenger side. The Spearco part # was 2-221-SP. The invoice # was 62188 on 11-12-99 for a price of $694.00. This is a racing type, high efficiency, low-pressure drop type, not the old "cheapies" they used to make. I was skeptical when I first contacted them but they had the long thin core that I needed. I looked at their new style and I could tell they had stepped up and started producing " real" intercoolers.
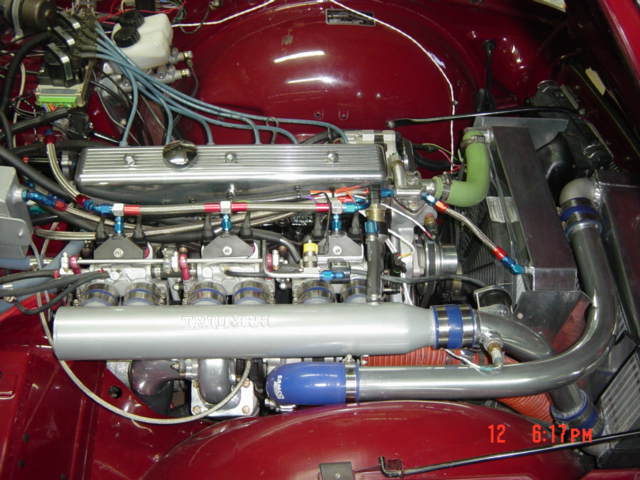
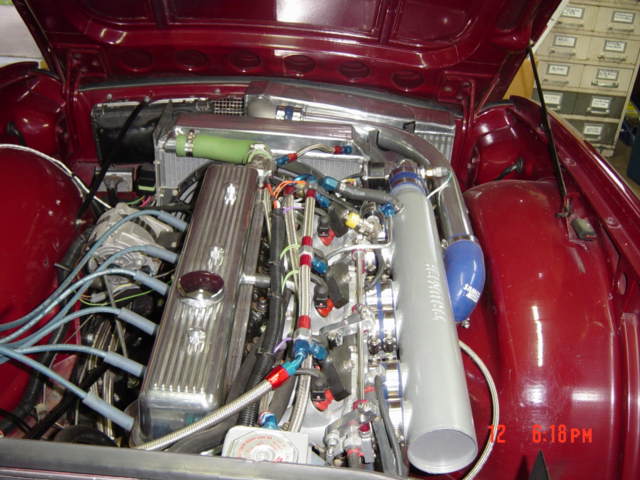
This shot is of the right hand side of the engine. The intake manifolds and plenum are from a Triumph 2.5 PI sedan. The Lucas
throttle bodies are well matched to the head and actually help the flow. If you look closely they taper very gently all the way
to the head interface. Just make sure to use new throttle shafts, bush and precision ream the throttle shaft bearings, and very
carefully seat each throttle blade to it's respective hole. If this is not done correctly you will play hell getting the idle
speed/mixture right. The inlet plenum is a very nice piece, which has built in velocity stacks. It has plenty of strength. I have
run it to 25 psi. The main problem is getting the hose connections to stay on. The first time I stood on the gas with the Lucas
system I made it about a block from the house before the plenum blew off. I just made two small brackets from 0.065 sheet that
bolt to the factory ears on the bottom and connect to the throttle bodies to hold the plenum.
Greg sand bent the aluminum tubing like the old time fabricators did using the following procedure:
Use fine DRY sand! Plug one end with wooden plug, fill the tube with sand, packing as you go, and plug the end. Heat the inside
radius with a rose tip applying pressure in the direction of the bend and you will feel the tube yield and start to bend. Move
along the inside radius of the tube until the bend is complete. Bend VERY slowly or you will split the outside of the bend. Too
much heat or hurry will kink the inside of the bend.
The custom aluminum radiator is from Ron Davis.
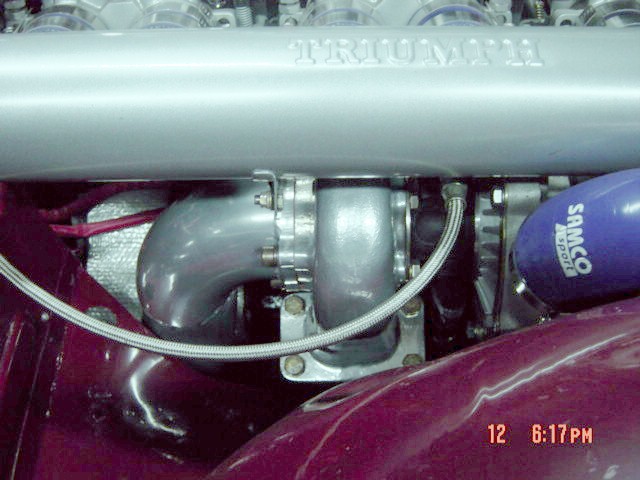
This shot is of the turbocharger. The turbo is a T04E50 compressor and I think the turbine housing is now a .63. I need to call my turbo guy here in town and get the final numbers now that we have it dialed in. I tried a .48 but the back pressure was so restrictive that the engine wouldn't pull past 5000 rpm but damn did it have low end boost - 12 psi @ 2200, 4psi @ 1800. Now the engine pulls hard right up to the 7000 rpm redline and the boost starts about 2000 with 12 psi @ 3000. This turbo is so efficient that I had to install a blow off valve to vent the system when the throttles slam shut. Use the Bosch plastic one from a Saab. It is cheap and light.
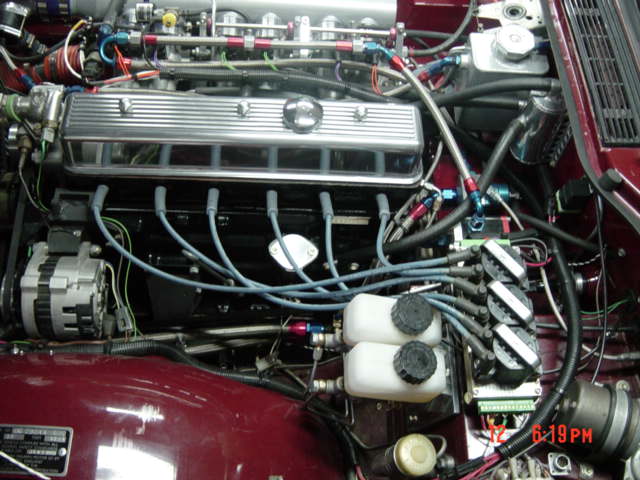
This shot is of the left hand side of the engine. The radiator expansion tank and the breather/catch can for the crankcase are mounted next to the hood latch. The tachometer signal is generated by the Electromotive Tec II direct ignition & fuel management system. Those are Tilton 74 series master cylinders 5/8 rear, 3/4 front. (this is sized for the rotor/caliper combination) with a balance bar welded into the pedal to change front - rear brake balance. Greg also changed the pedal ratio so he didn't need the booster. The canon fuel filter is positioned next to the coil packs.

This shot is of the front of the engine. The cross brace has been carefully cut out to provide clearance for the electric fan. The crank position sensor is immediately behind the cross brace and is shrouded in the photo (only the wire and connector is visible).

This shot is of the air intake. The air filter box is from a VW Rabbit with the Bosch air metering door removed. Greg laid up a glass reinforced epoxy adpater to get to a 3" hose. He first saw the filter box on Dino Crescentini's Alfa GTV GT3 car back in about 1990. It is compact and fits the TR6 grill opening perfectly.
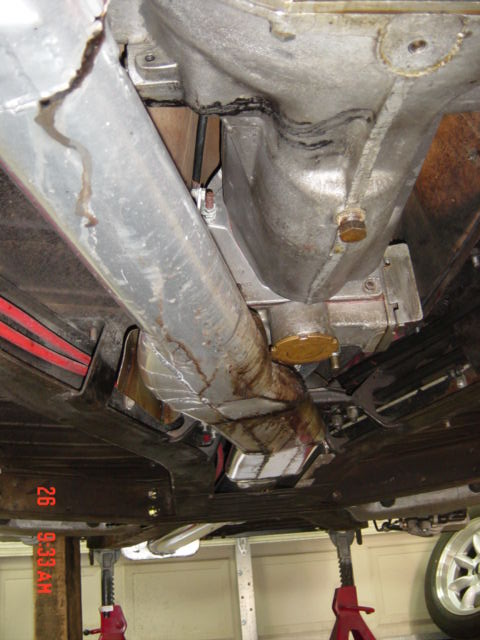
This shot is of the installed custom exhaust system
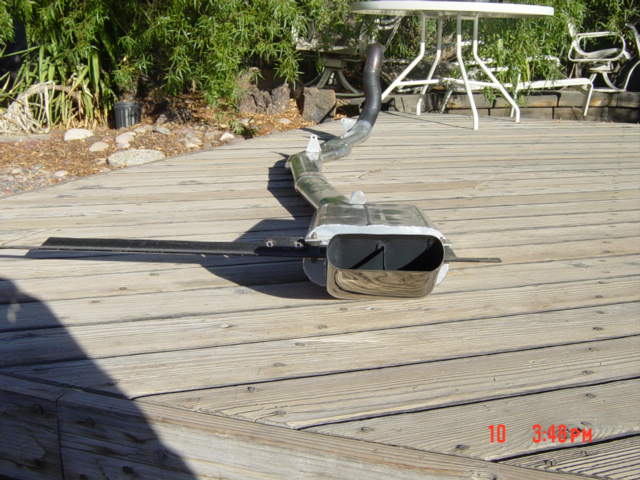
This shows the entire exhaust system removed from the car.
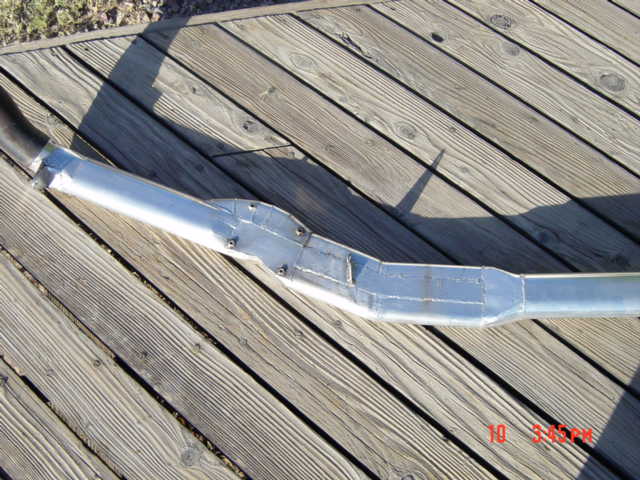
This shows the curved center section that avoids interference with the transmission.
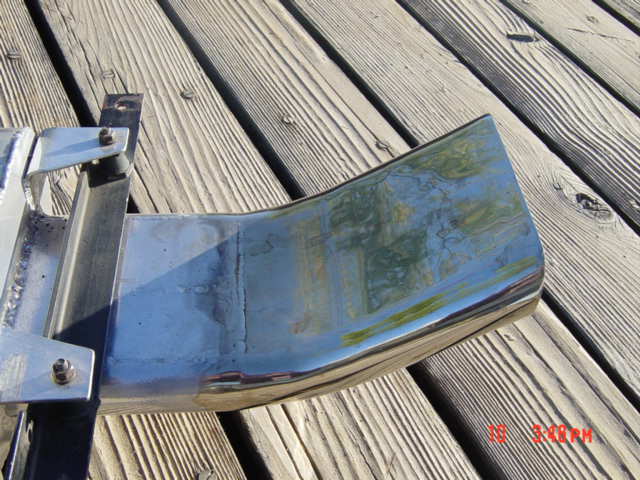
This shows the final turned up section at the rear; real nice work.
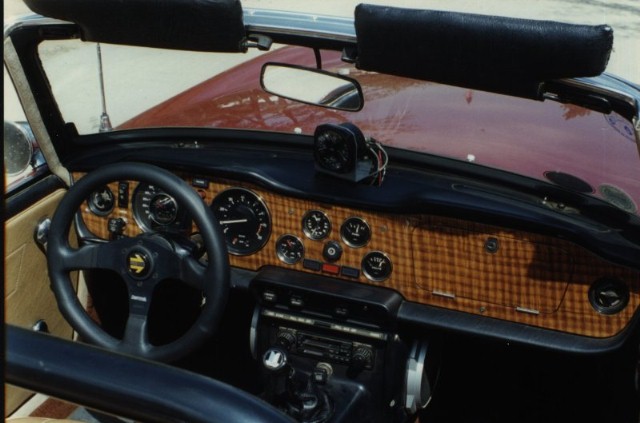
This shot is of the dash. It certainly looks like a stock vehicle - it certainly does not act like one.